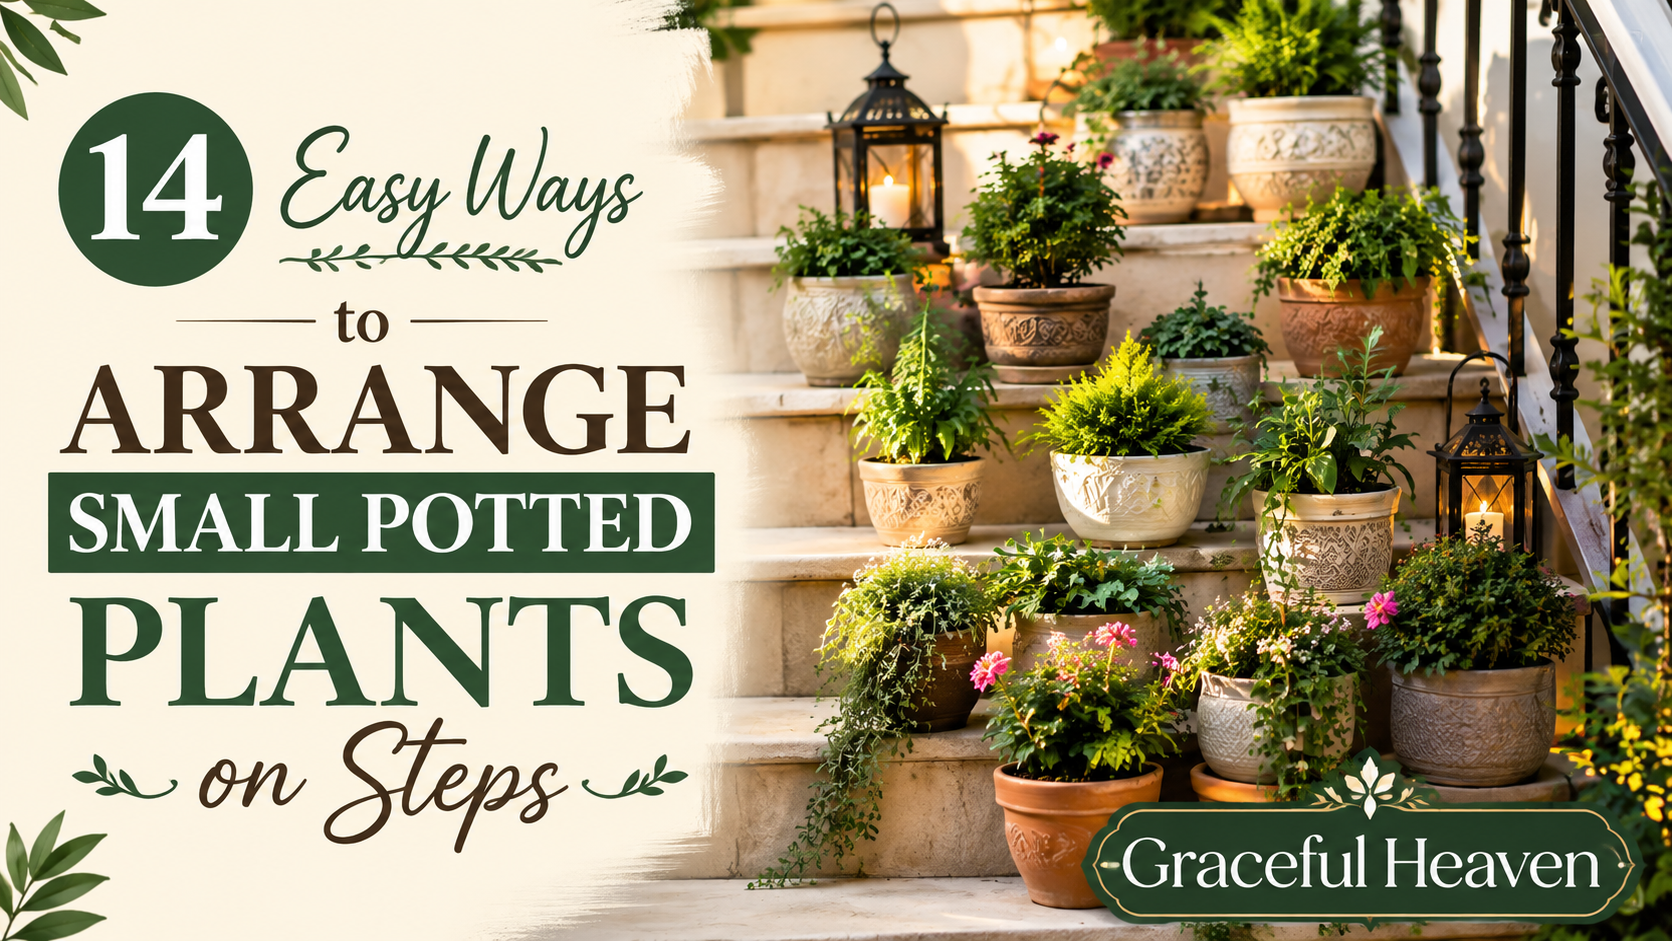
You’ve got a staircase. It’s bare. And every time you walk past it, something in your gut says it could look so much better. 🌿
That feeling? It’s not vanity. Steps are one of the most underused spaces in a garden or entryway. They’re basically a built-in display shelf that most people ignore completely. So today, we’re fixing that.
Let’s get into it.
1. Go Small on the Edges, Bold in the Middle
Here’s the thing about steps: they’re narrow. So if you cram big pots everywhere, you’ll trip. Or worse, someone else will.
Put your tiniest pots — think 4 to 6 inches — right along the edges of each step. Save the slightly bigger, showier plants for the middle steps where people naturally pause to look. It creates a kind of visual rhythm. Small, small, WOW, small, small, WOW. 🌸
2. Alternate Sides Instead of Lining Both
A lot of people instinctively put pots on both sides of every single step. It looks busy. Cluttered, even.
Try this instead: left side on step one, right side on step two, left again on step three. It’s a zigzag. Your eye follows it up the stairs naturally, almost like a visual staircase within the staircase. 😄
3. Use Odd Numbers, Always
Three pots feel intentional. Four pots feel like you ran out of ideas halfway through.
This isn’t some made-up design rule either — it’s a real principle called visual asymmetry, and it works because our brains find odd groupings more dynamic and less “staged.” So group your pots in threes, fives, sevens. Never pairs.
4. Play With Height Using Risers or Stacked Bricks
Flat pots on flat steps can look one-dimensional. Boring, honestly.
Grab some old bricks, wooden crates, or even upside-down terracotta pots, and use them as risers under your smaller plants. Now you’ve got layers. Depth. A little bit of drama. 🧱
Think about a bakery display case for a second. The cupcakes aren’t all sitting flat — some are elevated on stands. That’s exactly the trick here, just outdoors and with succulents instead of frosting.
5. Mix Textures, Not Just Colors
Everyone thinks about color first. Reds, purples, yellows. Fine.
But texture is what makes an arrangement feel expensive, even if you spent ten dollars total. Pair something spiky like a small aloe with something soft and trailing like creeping Jenny. Add one plant with big, glossy leaves. That contrast does more work than color ever could.
6. Color-Coordinate the Pots, Not Just the Plants
So here’s a mistake a lot of beginners make: they obsess over the flowers and completely forget the containers.
Pick two or three pot colors max — say, terracotta, white, and matte black — and stick to that palette across your whole staircase. It ties everything together, even if the plants themselves are wildly different species. 🎨
7. Use One “Anchor Plant” at the Bottom
Every good arrangement needs a starting point. A place your eye lands first.
Put your biggest, most striking pot right at the base of the stairs. A fern with dramatic fronds. A hydrangea in full bloom. Something that says “come on up” before you even move to step two.
8. Keep Walking Space Sacred
This one’s less about beauty and more about not breaking your neck. 😅
Rule of thumb: leave at least 12 to 14 inches of clear space per step for actual foot traffic. Measure it. Don’t eyeball it, because eyeballing it is how ankles get twisted and pots get shattered.
9. Repeat One Plant Species Every Few Steps
Randomness can look chaotic if you’re not careful. One trick professional designers use constantly is repetition.
Pick one hero plant — maybe a small boxwood or a trailing ivy — and place it on every third or fourth step. It creates a pattern your eye can follow up the whole staircase, almost like punctuation marks in a sentence.
10. Group by Sunlight Needs, Not Just Looks
Steps rarely get uniform sun. The top might bake all afternoon while the bottom stays shaded by a porch roof or a tree.
So group your shade-lovers — ferns, begonias, pothos — near the bottom, and save your sun-worshippers like succulents and marigolds for the top steps. Otherwise you’ll be replacing dead plants every three weeks, and that gets old fast.
11. Add a Trailing Plant to Soften Hard Edges
Concrete steps are stiff. Angular. A little cold, visually speaking.
One trailing plant per few steps — string of pearls, ivy, or even a sweet potato vine — spills over the edge and softens that hard line. It’s a small move but it changes the whole feel of the staircase, almost overnight. 🌱
12. Use Seasonal Rotation Instead of Permanent Plants
Nobody said this has to be a one-and-done arrangement.
Swap in pansies and mums for fall. Tulips and daffodils for spring. Bright petunias for summer. Rotating plants seasonally keeps the whole display feeling alive and current, instead of turning into wallpaper you stop noticing after week two.
13. Add a Lantern or Small Light Between Pots
Not every item on your steps needs to be a plant. Sometimes the best addition isn’t green at all.
A small solar lantern tucked between two pots adds warmth once the sun goes down. It also makes the whole arrangement feel finished, like someone actually planned it rather than just placing pots wherever they’d fit. ✨
14. Step Back and Look From the Bottom, Not Just Up Close
This is the one almost everyone skips.
You arrange plants standing right next to them, up close, fussing over each leaf. But nobody experiences your staircase that way. They see it from the bottom, walking up, or from the street. So once you’re done, walk twenty feet away and actually look. You’ll spot gaps and imbalances you’d never notice standing two feet from the pots.
A Few Extra Things Worth Knowing
Let’s slow down for a second, because there’s more to this than just placement.
Drainage matters more than people think. Steps often don’t have great runoff, especially if they’re tucked under an awning. A pot without proper drainage holes sitting on a step can rot roots within weeks, especially after a heavy rain. Always check for that hole before you fall in love with a pretty pot. 🕳️
Weight is a real concern too. Ceramic and stone pots look gorgeous, sure. But they’re heavy, and heavy pots on narrow steps can become genuinely dangerous if they shift or get bumped. Lightweight resin or fiber-clay pots mimic the look of stone without the risk.
Wind is sneakier than you’d expect. If your steps are exposed — no overhang, no walls — tall, top-heavy plants can topple in a strong gust. Keep taller plants toward the back or against a railing where they’ve got some support.
Here’s a quick scenario to make this concrete. Imagine you’ve got a five-step staircase leading to your front door. Step one, at the bottom, gets an anchor fern in a big terracotta pot on the left. Step two has two tiny succulents on the right, elevated on a small wooden riser. Step three — your middle step, the one people pause on — gets three matching white pots with trailing ivy spilling over both edges. Step four repeats a smaller version of that fern from step one. Step five, right by the door, gets a solar lantern next to one striking flowering plant, maybe a geranium in full bloom.
Walk up those stairs and it doesn’t feel random. It feels considered. Deliberate. Like someone who actually cares about their entryway lives there.
Common Mistakes That Quietly Ruin the Look
A few things trip people up again and again. Worth naming them directly.
Overcrowding is probably the biggest one. More pots doesn’t automatically mean more beautiful — past a certain point, it just reads as cluttered and honestly a little unsafe.
Ignoring scale is another. A tiny 3-inch succulent next to a massive 16-inch planter looks like a mistake, not a design choice, unless there’s a clear size gradient connecting them.
And matching pots on every single step? It’s tidy, sure, but it can look sterile. Almost showroom-like. A little variation — same color family, different shapes — tends to feel more like a real home and less like a display at a garden center.
Materials Worth Considering
Not all pots behave the same way outdoors, and steps take a beating from foot traffic, weather, and temperature swings.
Terracotta is classic and breathes well, which roots love. But it cracks in freezing temperatures if water gets trapped inside, so it’s not ideal for harsh winter climates unless you bring pots in.
Resin and fiberglass pots are lightweight, weather-resistant, and increasingly hard to distinguish from real stone or ceramic. For steps specifically, where weight and stability matter, these are often the smarter pick.
Metal planters look sleek and modern, but they heat up fast in direct sun, which can cook root systems in summer. Save these for shadier steps if you go that route.
Plant Picks That Actually Hold Up on Steps
Some plants are just built for this kind of display, low maintenance and forgiving if you forget to water for a few days. 🌵
- Succulents and hens-and-chicks — barely need watering, thrive in small pots, perfect for sunny top steps
- Dwarf boxwood — structured, evergreen, gives year-round shape even in winter
- Sweet potato vine — grows fast, trails beautifully, fills gaps within weeks
- Impatiens — one of the few flowering plants that actually enjoys shade, great for lower steps
- Creeping thyme — low, fragrant, and can handle a bit of foot traffic if it spills onto the step itself
Mix two or three of these across your staircase and you’ve basically guaranteed a low-effort, high-impact result.
Small Details That Make a Big Difference
Saucers under every pot. This one’s not glamorous, but it protects the actual step material from water stains and mineral buildup over time, especially on painted wood or light-colored stone.
Consistent pot rims. Even if your pots vary in color, keeping the rim style (rolled edge, straight edge, tapered) consistent adds a subtle sense of cohesion without looking matchy.
Cleaning debris weekly. Steps collect leaves, dirt, and dead blooms fast because they’re a high-traffic zone. A quick five-minute tidy keeps the whole arrangement looking intentional instead of neglected.
So where does that leave you? Probably standing at the bottom of your own steps right now, mentally rearranging pots. 😉
Start small. Pick three pots, group them in an odd number, and place them on your bottom step this weekend. See how it feels. Add more once that first grouping feels right, and let the arrangement grow the way a good garden always does — one step at a time.